Antes de continuar con mis proyectos pendientes he decidido seguir explorando las facetas básicas de la creación con Blender. Esta última semana he estado experimentando con la creación de materiales en Cycles.
Before getting on with my pending projects I decided to keep exploring the basic aspects of Blender to gain a better control and understanding of it. I spent last week experimenting with the creation of new materials in Cycles.
Cycles es el nuevo renderizador interno de Blender y sus principales características son la capacidad de crear imágenes fotorrealistas mediante el proceso de ‘path tracing’ y el permitir el aprovechamiento de la gran capacidad computacional de las últimas generaciones de tarjetas de gráficas de Nvidia (las tarjetas de AMD no son soportadas todavía, pero se espera que lo sean en el futuro). La creación de materiales en Cycles se realiza mediante una interfaz visual llamada ‘Node editor’. A traves de esta interfaz se combinan diferentes materiales básicos (difuso, brillante, cristal, transparente, traslúcido, etc…) para crear materiales más sofisticados, como por ejemplo la pintura metalizada de un coche o la superficie veteada de una tabla de madera. Se ha creado recientemente un hilo muy interesante en Blenderartists en el que se discuten diferentes métodos para conseguir materiales complejos a través del editor de nodos. Una de las aportaciones más interesantes a ese hilo ha sido precisamente el eficaz método de monsterdog para obtener pintura metalizada.
En la última versión de su método, monsterdog había añadido una serie de nodos que le permitían añadir manchas de óxido a la pintura. El resultado era prometedor, por lo que decidí hacer mis propias pruebas cambiando algunos de los nodos originales por un nodo de escala de color (Color Ramp) que me permitía en un solo paso crear una escala de grises y controlar de forma flexible la cantidad de óxido a aplicar a la pintura. También cambié la textura procedural con la que se generaba la superficie del óxido por una textura fotográfica creada por mí a partir de algunas fotos que saqué hace un tiempo a la tapa de una alcantarilla, y añadí un multiplicador a la textura para que sobresaliese respecto a las zonas contiguas de pintura. El resultado después de varios ajustes fue este:
La mejora era notable, así que hice algunas pruebas más y las publiqué en el hilo arriba mencionado, tras lo cual, algunos participantes me pidieron que compartiera la combinación de nodos utilizada. Parecía una buena idea, pero pensé que sería incluso mejor si además del nuevo método para el óxido, podía contribuir con un método totalmente nuevo para otra clase de material.
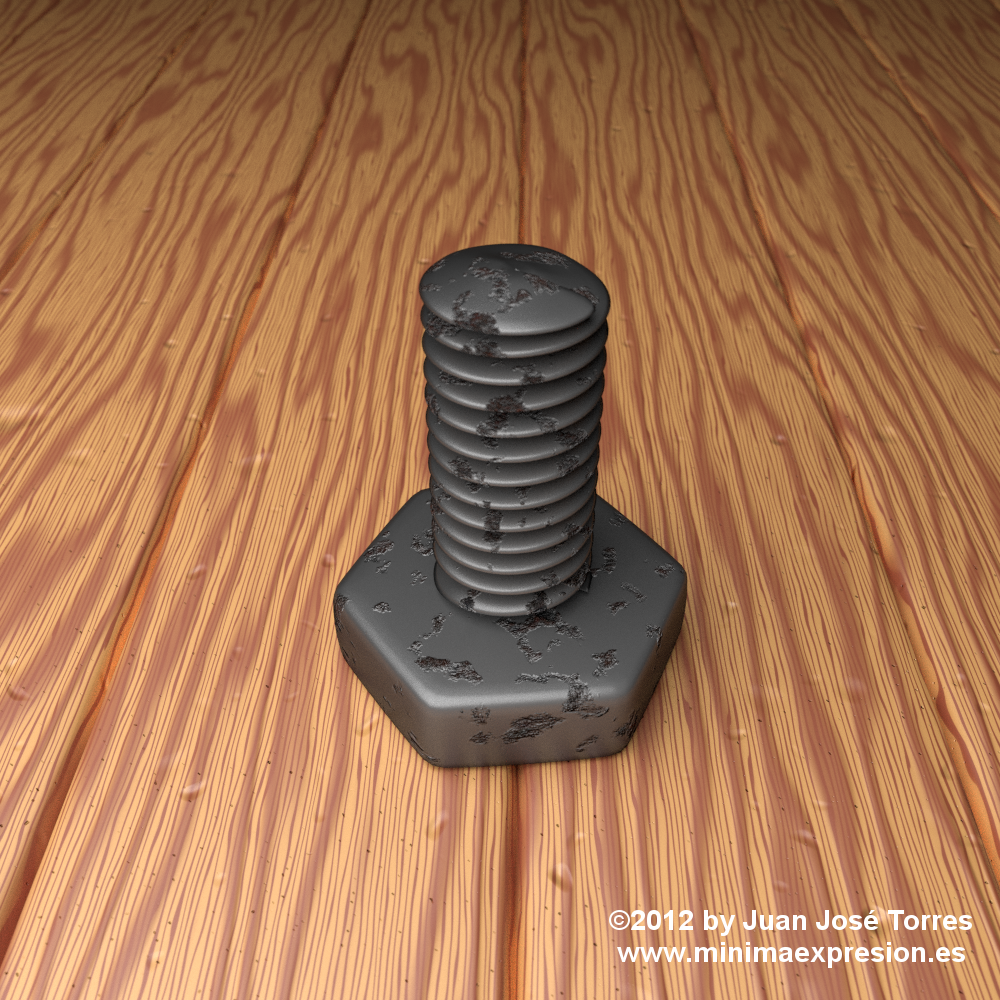
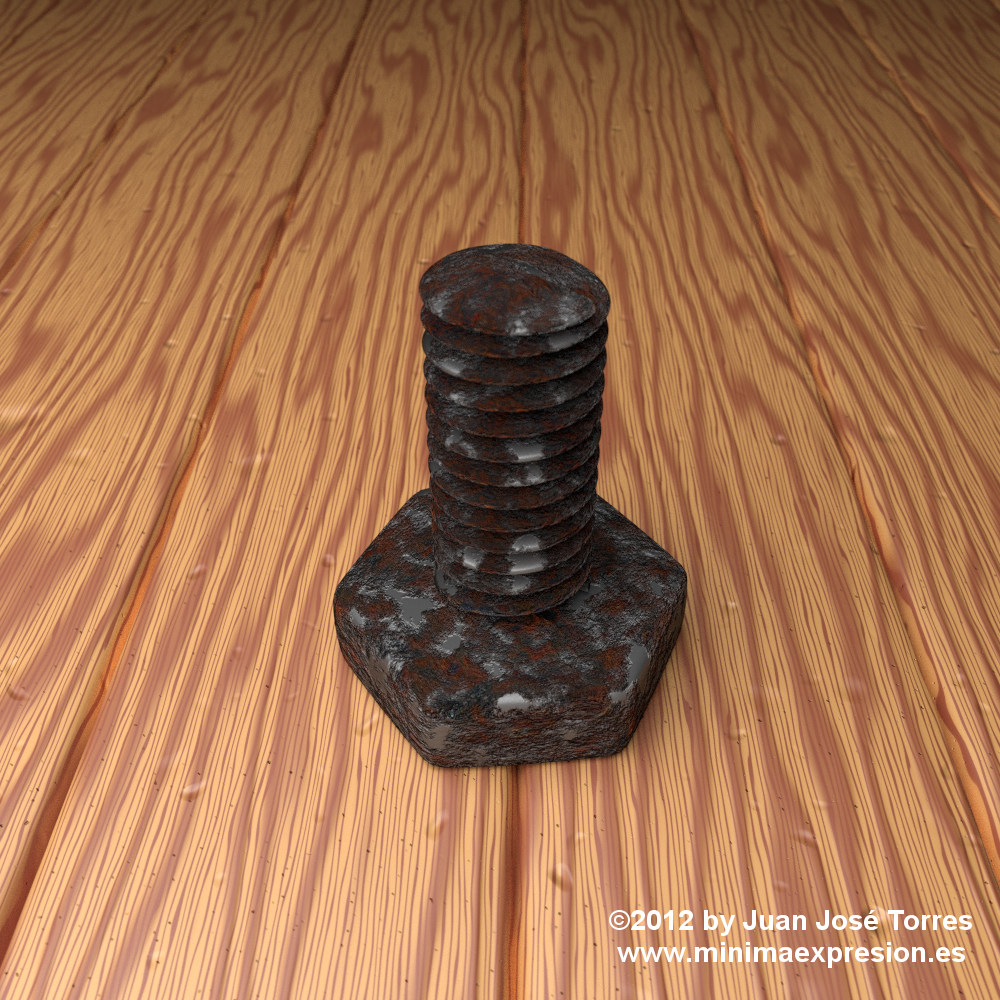
Tras largas horas de trabajo, estos fueron los resultados obtenidos:
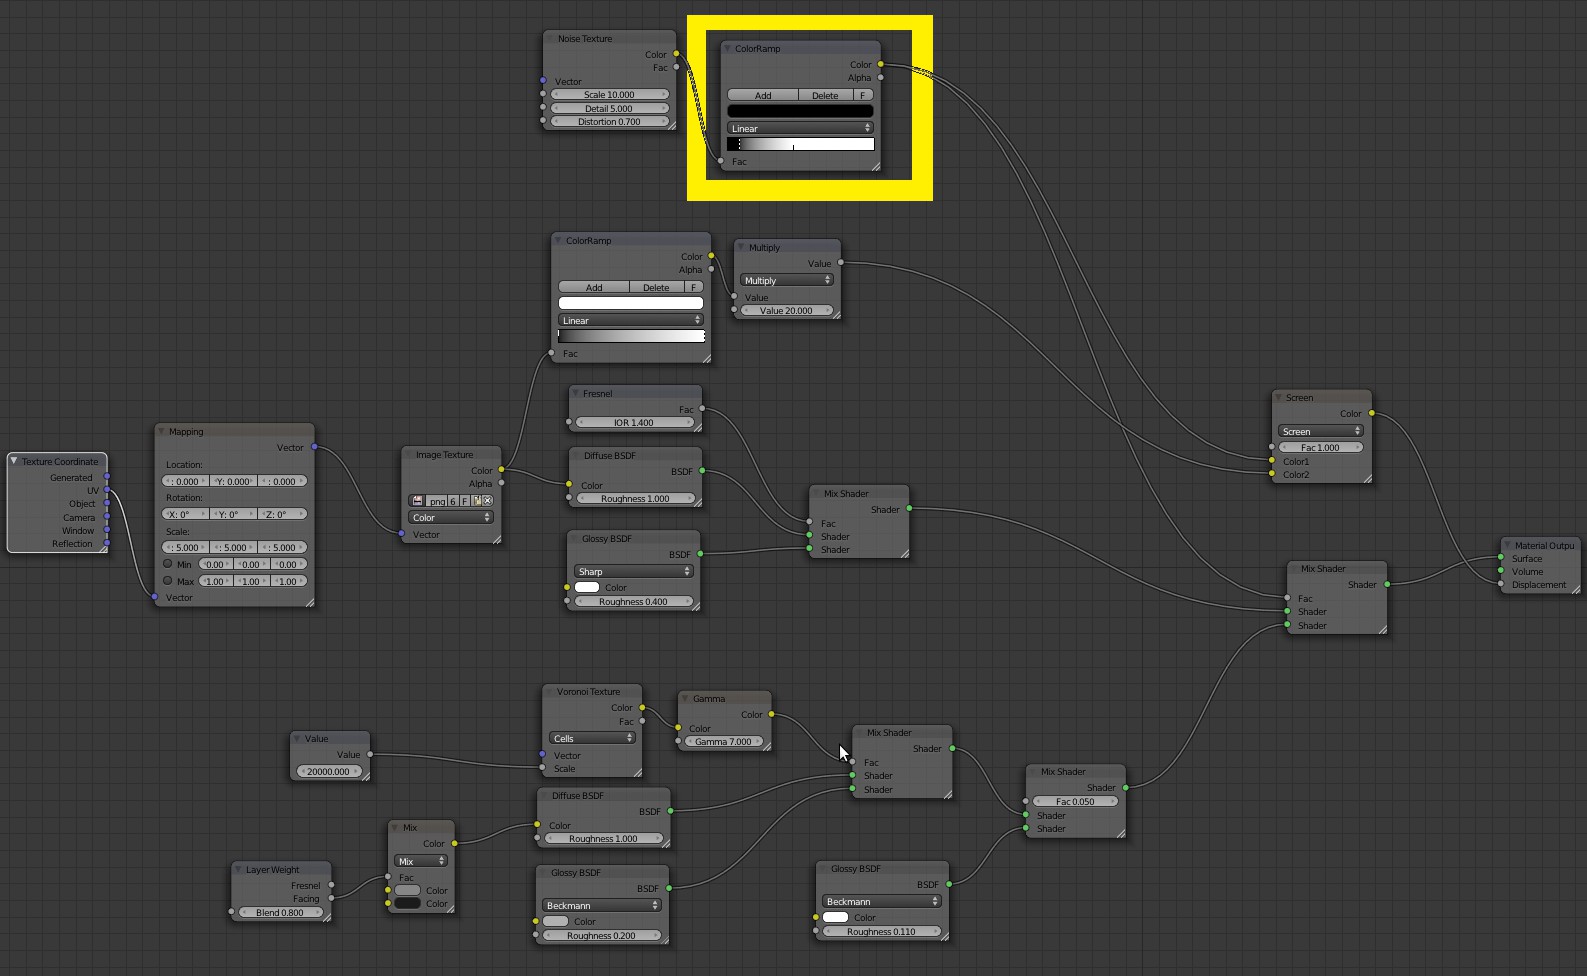
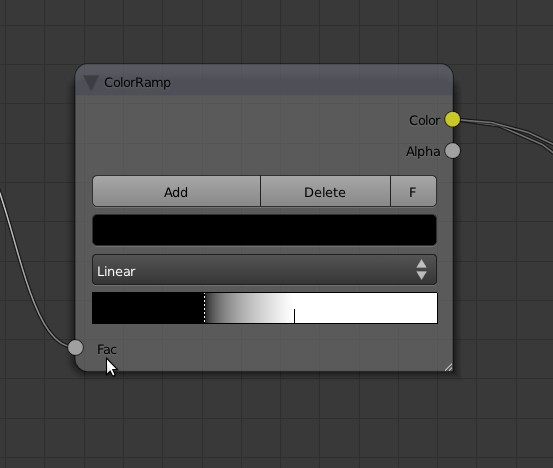
Nodos para manchas de óxido pequeñas (nodo resaltado en amarillo controla la cantidad de óxido):
Nodos para manchas de óxido medianas:
Nodos para machas de óxido grandes:
Y finalmente…
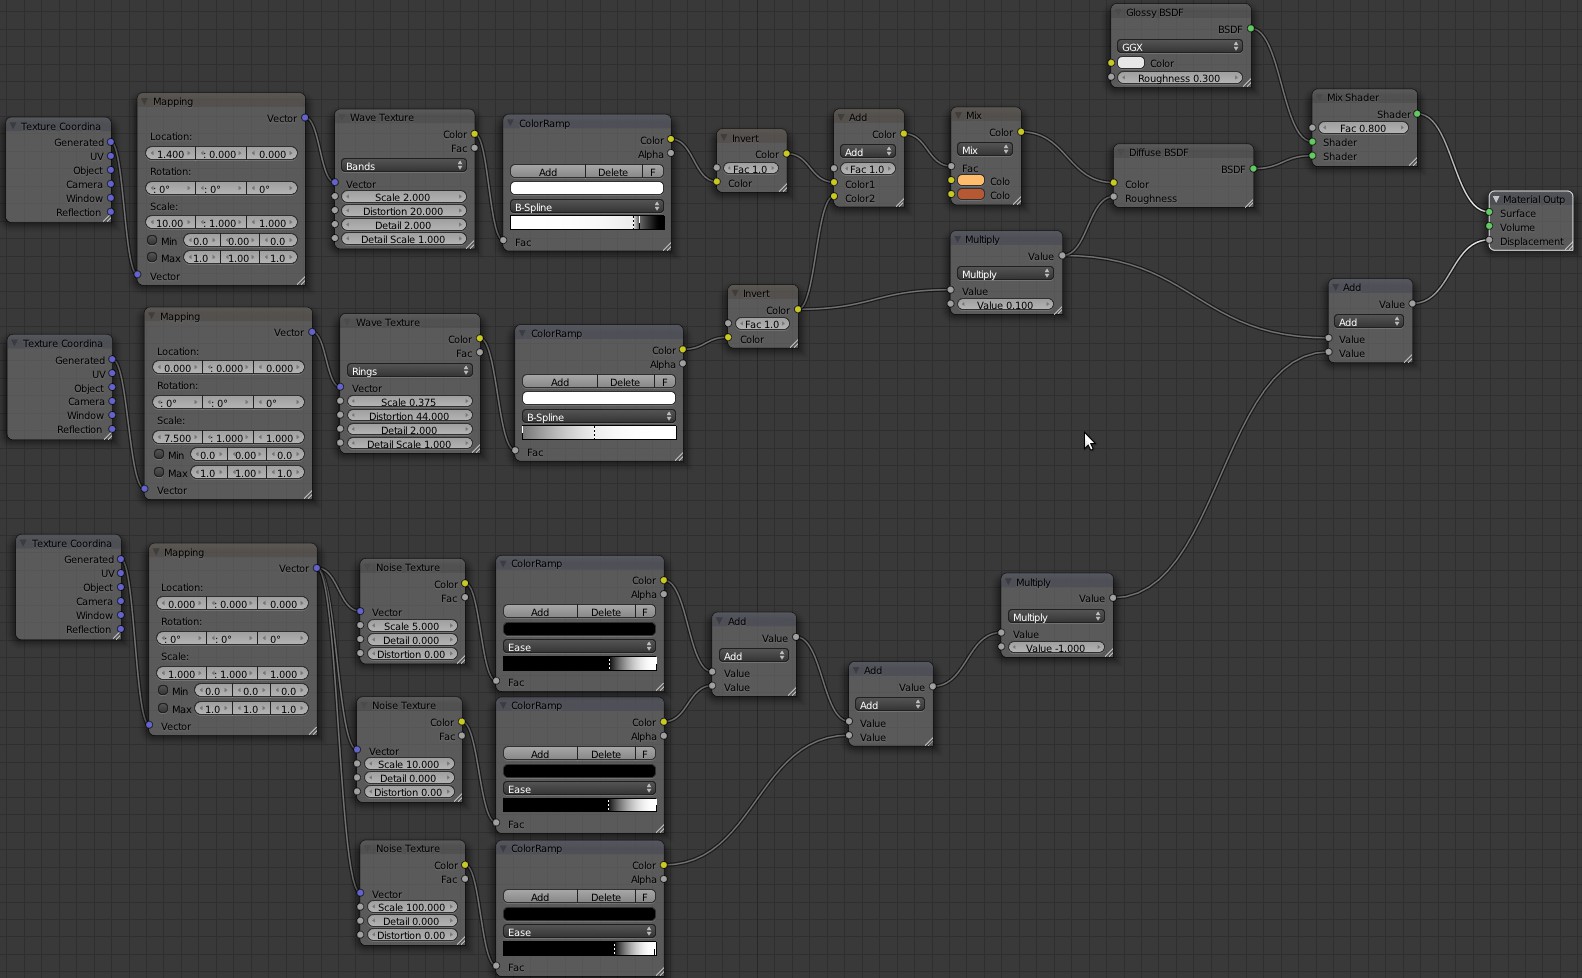
Nueva configuración de nodos para obtener madera completamente procedural (sin texturas creadas a mano):
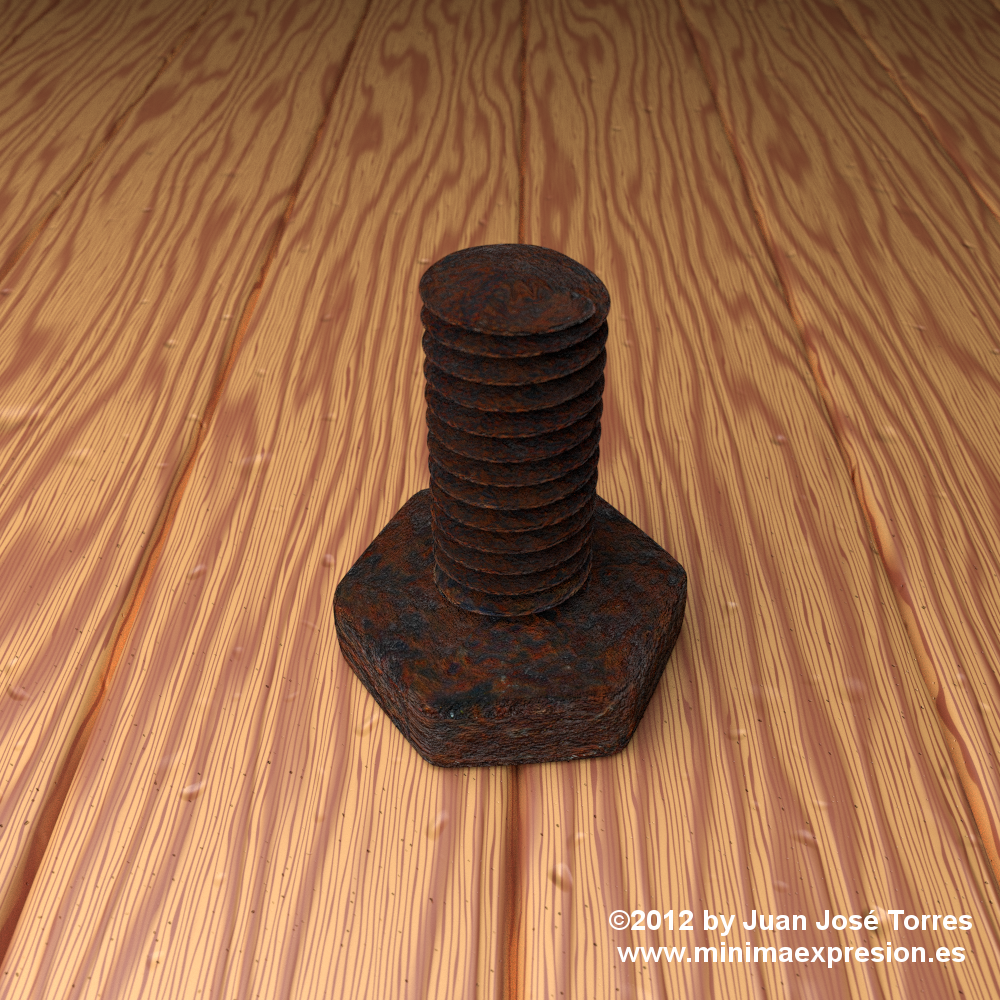
Y he aquí una composición final:
Y esto es todo de momento. Se aceptan sugerencias para nuevos materiales. 😉
Cycles is Blender’s new internal renderer and among its main features are the ability to create photorealistic renders by means of path tracing and the possibility to use the computing power of Nvidia GPUs to render images at incredible speeds (2 x Nvidia GTX 580 = 7 x Intel I7 2600K). AMD GPUs are not supported yet, but are expected to be in the future.
Material creation in Cycles is done through a visual interface called «Node editor». Using this interface, differente basic materials (difusse, glossy, glass, transparent, etc…) are combined to create more sophisticated materials, such as car paint or wood. Recently some Blender users started a very interesting thread over at Blenderartists where material node setups are being shared and discussed. One of the best contributions so far in that is monsterdog’s wonderful car paint node setup.
In his last version for this node setup, monsterdog added a series of nodes that enabled rust stains in the car paint. The results were promising, so I decided to do my own testing substituting some of the original nodes with a simple color ramp node so I could easily control the amount of rust in a flexible way. I also changed the procedural noise texture in the rust surface for a photorealistic rust texture I created from picture of a manhole cover I took some time ago, adding a multiplier to the displacement effect so the rust sticks out of the model. After some tweaking, this is what I got:
Improvement was quite noticeable, so I did some more tests and posted my resulting renders in the thread I mentioned above seeking others’ opinions. That’s when monsterdog and cekuhnen asked if could post my node setup. This prompted me into refining the node setup a little further and in the process create a brand new node setup for a different material. So here it is for everyone to use, improve and comment: a rust node setup with two variations and one new wood node setup which is fully procedural and doesn’t need any external image texture.
Node setup for small rust stains (the node highlighted in yellow is the one controlling the ammount of rust):
Node setup for medium rust stains:
Node setup for maximun rust stains:
And finally…
New node setup for fully procedural wood:
Here is a final composition:
So this is it for now. I accept suggestions for new node setups. 😉



Fantastic rust, thank you, great job
Thank you. You might be interested in this post. It’s a new version that doesn’t require external image texture and there is a blend file for download if you want to try it out yourself.
Thank you, I like the wood texture.
hi there , in your node setup of small rust stains use used a texture image. can you specify what texture you used and where you got it from . thankyou
Hi. The rust texture I used is a custom one made by myself out of some pictures I took of a rusty manhole cover. 🙂